How to Edit 360° Videos Professionally with Insta360 Pro 2 | FCPX & Premiere Pro Workflow
Learn professional 360° video editing with Insta360 Pro 2 — creative bubble acting, masking, stitching, reframing, and VR workflow in FCPX or Adobe Premiere Pro.
INSTA 360 PRO2 CAMERA GUIDE
Viral Gala
11/15/20254 min read


How to Master Professional 360° Video Editing with the Insta360 Pro 2
🎬 Unlock the Potential of VR Storytelling
360° filmmaking isn't just a trend; it's the future, rapidly transforming VR experiences across tourism, religion, events, product showcases, and metaverse productions.
If you're a creator using the Insta360 Pro 2, you have a serious tool in your hands—one that delivers stunning 8K/6K clarity, FlowState stabilization, and professional-grade stitching.
This guide will walk you through a proven, professional post-production workflow to turn raw footage into cinematic, immersive VR content.
📸 Step 1: Shoot Smartly with the Insta360 Pro 2
Great edits start with great footage. Treat your 360° shoot like any high-end production: plan your shots, use professional camera settings, and always be mindful of the "fourth dimension"—what the viewer will see behind the camera!
Essential Capture Settings:
Resolution: Opt for 8K 3D or 8K 2D/6K 2D to maximize detail.
Dynamic Range: Turn HDR ON for outdoor scenes to manage high-contrast light.
Motion: Use a shutter speed of 1/50 or 1/60 for natural-looking motion blur (crucial for realism).
Clean Image: Keep the ISO low (ideally 100-400) to minimize noise, and use ND filters for bright sunlight.
Alignment: Always maintain correct leveling using a tripod or monopod.
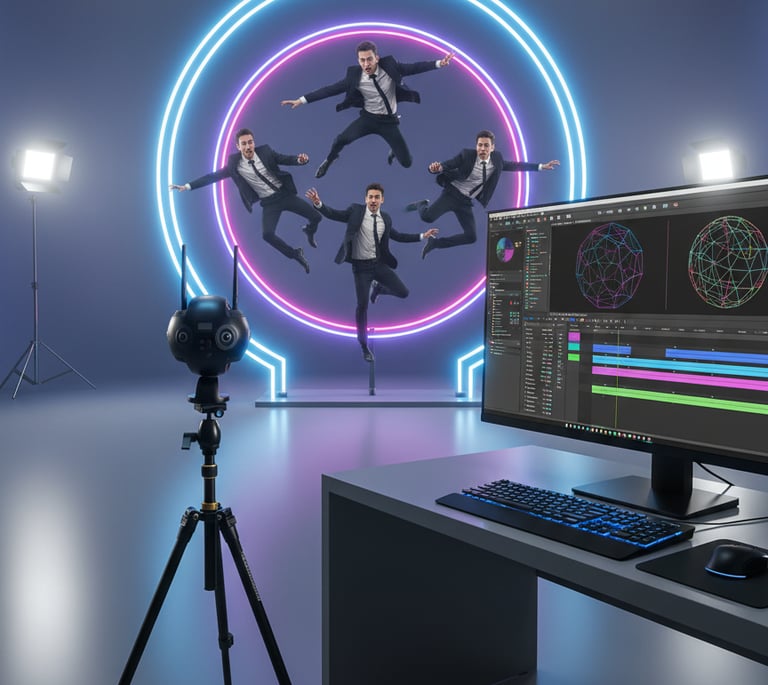
Creative "Bubble Tool Acting" Technique
This powerful VR technique is perfect for storytelling and magical scenes, allowing a single actor to appear multiple times in the same 360° space (cloning effect):
The Concept: One actor performs multiple roles, with each performance shot separately.
The Post-Production: The shots are later composited using masking inside the 360° frame (as detailed in Steps 3 & 4).
The Result: Multiple duplicates of the same person appear in a single VR scene, perfect for metaverse content or a unique cinematic look.
🧵 Step 2: Stitch Your Footage Properly (The Foundation)
Before any creative editing begins, you must turn your six camera files into one seamless spherical video, known as an Equirectangular projection.
Primary Tool: Use Insta360 STUDIO (or Mistika VR for Pro Grade projects).
Workflow: Import your Pro 2 footage and ensure you select the correct Lens Profile.
Stabilization: Apply FlowState Stabilization for gimbal-level smoothness. The Pro 2 uses a precise gyroscope and powerful algorithms to achieve this in-camera.
Seams: Crucially, adjust the Stitching Line to hide the tripod and any visible seams.
Export Settings: Export to ProRes 422 / ProRes 422 HQ for maximum quality. Set the color profile to LOG mode to retain maximum flexibility for color grading.
🖥️ Step 3: Editing and Masking in Final Cut Pro X (FCPX)
FCPX provides a robust and fast environment for 360° editing.
Setup and Tools:
Enable 360° Mode: Create a project with an Equirectangular resolution (e.g., 3840×1920 or 5760×2880).
Import your stitched ProRes files.
Click Viewer → 360° Viewer Mode to navigate your scene.
Use the Reorient Tool to adjust the camera's initial viewing angle (the "default" view).
Keyframe your rotation for dynamic reframing and movement.
Bubble Acting Masking in FCPX:
This is where the cloning magic happens:
Layering: Duplicate your actor footage on multiple upper layers (one layer for each clone).
Masking: Use the Draw Mask Tool to precisely mask around the actor in each layer.
Blending: Use feathering to softly blend the mask edges into the background.
Timing: Align the timing so all "clones" appear naturally in the scene.
Consistency: Ensure the camera's rotation remains consistent across all masked layers.
Color Grading:
Convert your LOG footage to Rec.709 for standard viewing.
Adjust highlights, shadows, and mid-tones.
Be cautious with vignettes—apply them ONLY if you are exporting a reframed flat video, as they can break the 360-degree format.
🖥️ Step 4: Editing and Advanced Compositing in Adobe Premiere Pro
Premiere Pro is the go-to choice for advanced multi-layer masking, VR effects, and complex compositing.
Setup and Tools:
Sequence: Create a new sequence using the VR Equirectangular preset (3840×1920 or higher).
View: Enable the VR view to look around the scene as you edit.
VR Tools: Utilize effects like VR Projection, VR Blur / VR Sharpen, VR Rotate Sphere, and VR Reframe.
Bubble Tool Acting Masking in Premiere Pro:
Place each separate shot of the actor on separate timeline layers.
Use the Pen Tool within the Opacity controls to create precise masks.
Feather the mask edges and consider using a Track Matte for complex blending.
Tip: Avoid placing masked areas near the stitch lines for a cleaner composite.
🎨 Step 5: Creative & Immersive Enhancements
Take your VR project to the next level by focusing on the full immersive experience:
Add 360° transitions to move seamlessly between scenes.
Integrate motion graphic elements as spherical overlays.
Don't forget the sound! Add ambient audio or, better yet, Spatial audio (Ambisonics) which reacts to the viewer's head movement, maximizing immersion.
Remove the camera's support structure using the "Tripod Patch" tool (often called Nadir Patching).
🚀 Step 6: Export Settings
For YouTube / Meta / Oculus:
H.265 (HEVC)
5760×2880 or 3840×1920
Bitrate: 60–120 Mbps
Include Spatial Media Metadata
For Offline VR:
ProRes 422 HQ
8K or 6K based on hardware usage
❓ Frequently Asked Questions (FAQ)
Q1: What is the biggest challenge in editing 360 footage? The most common challenge is managing 8K post-production which is hardware intensive. As many creators on Reddit discuss, the key is using a low-res proxy (like the Pro 2’s proxy files) during editing and only stitching/exporting the final, selected clips at full resolution.
Q2: Why is my footage still shaky even with FlowState? While FlowState is powerful, it cannot eliminate large movements or displacement. Always perform a Gyro Calibration before shooting, and use the camera in a vertical orientation when shooting if possible. FlowState is applied in post, so ensure the option is checked when exporting from Insta360 Studio.
Q3: Why are the poles (Zenith/Nadir) blurry in my equirectangular footage? This is a natural distortion effect of the Equirectangular projection. The polar regions are stretched horizontally to cover the full width of the image. When retouching or patching the tripod, you may need specialized tools or techniques, sometimes even stitching in a different orientation.
🌟 Professional Tips for 360 VR Photography
The difference between a good VR video and a great one is attention to detail.
For Bubble Acting: Keep the camera absolutely still. Any rotation inconsistency will ruin the effect.
Composition: Always keep the most important action or actor in the front hemisphere of the camera's initial view.
Stitch Lines: Avoid placing critical action or faces near the stitch lines where seams are most likely to occur.
Exposure: Use soft or ambient light for uniform exposure, as inconsistent lighting across the six lenses will make color matching (and stitching) a nightmare.
🎥 Recommended YouTube Tutorial
🤝 Need Professional VR Production Support?
This complex workflow is what we specialize in. For professional VR production, content creation, or consulting on your next immersive project, 360 vr photography is here to help.
Contact Viral Gala for services:
Company: 360 vr photography
Websites: 360vrphotography.com and 360vrphotography.in

Experience
Engaging virtual tours for real estate and events.
Innovative
info@360vrphotography.in
+91 9920322366
